
Enter the Gungeon is a very difficult game with many different items, enemies, and bosses that can make the game different every single run.
The bosses in the game all follow different mechanics, either being multiple phases, a lot of things to keep track of, or special gimmicks that make the boss extra special.
Each boss’ mechanics make them especially difficult, with some bosses being randomly found on the floors you need to pass to win the game, and others being special bosses that you must make an effort to go fight for extra loot.
Out of all the bosses in Gungeon, 27 to be exact, these are the Top 10 Enter the Gungeon Bosses. Spoilers ahead for bosses all the way to the end of the game Enter the Gungeon.
10. The Last Human

Based of the Terminator movies, this fight is the boss of the Past for the Robot character.
This fight involves the Last Human in the human race (which still makes no sense in the storyline, but I digress) in a Robot Emperor’s arena, where we find that the Robot was the most powerful robot of the Robot Army.
When you fight her, she has various attacks such as firing two assault rifles, throwing out various amounts of grenades, summoning a circle of toxic goop, or summoning grunts to aid her in fighting.
While she has an interesting boss fight, as a character in the Gungeon, her story needs a decent amount to add on, for it is missing a lot for context in the Gungeon.
9. Old King
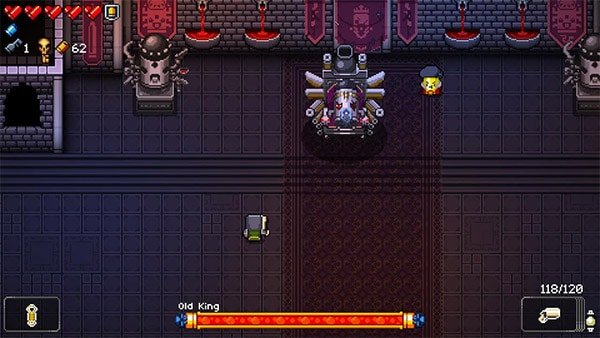
The Old King is labeled as one of the most difficult bosses in this game, and with the amount of work that goes into getting to the floor, it makes sense.
The player on floor one needs to save two keys (which pretty much means you get no chests the first floor) and drop into the Oubliette, fighting the boss there. In the Oubliette, you will find an armor piece called the Old Crest, which you must bring with you to the next floor.
In this next floor you need to go without taking any damage until you find a room that you can place the crest. After that, you can finally make it to the floor with this boss.
The Old King fires the same attacks as the Bullet King, but made harder by either being faster, making bullets less predictable, and having some attacks that deal double damage.
This is one of two bosses that can fire Jammed bullets without any curse at all and leaves a chest as victory on top of the floor’s original prizes. This boss takes a lot to go out of the way for but can leave the player rich coming out of it.
8. Beholster

The easiest of the bosses on this list, the Beholster is a large eyeball that holds six different weapons, using them all during the battle. This boss introduces the first boss in the Gungeon that requires a dodge roll.
In most cases, you can avoid attacks, but once the Beholster sways a giant laser across the player, there is no option other than dodging over it.
Along with that, this boss can summon Beadies, miniature eyes that shoot at the player, and is the first boss to use multiple attack patterns at once.
Some of these include a ray of shots to dodge between, bullets aimed straight at the player, and firing homing rockets that can be destroyed.
This all makes an interesting fight for the second floor in the game and can cause trouble to players just starting the game.
7. High Dragun
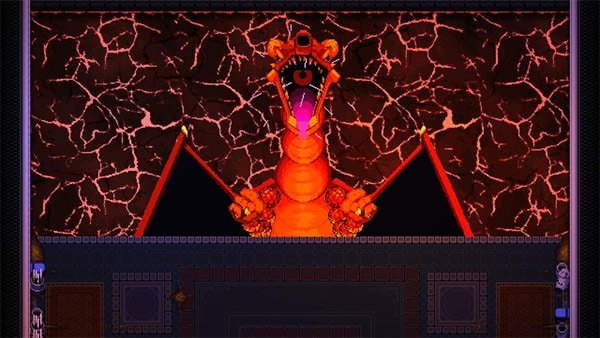
The “final” boss of the game, the High Dragun lives up to be a fight for the ages. Being the protector for the Gun that Can Kill the Past, the Dragun has a large flurry of attacks: rocket launchers, fire breath, dual machine pistols, throwing knives that shoot at you, and shooting homing skulls at the player.
Once the player chops his health down to about 15%, he enters his second phase, where he becomes invincible and sends a swarm of bullets into the stage, leaving only very small circles that the player can dodge roll into.
Once his swarm is finished, he rests, exposing his heart which can be shot to damage him.
Along with these threats, the fight can be worse. If the serpent follower is brought into this fight, they will betray you and fire at you following the attacks of the Dragun.
Once the boss hits its second phase, the fight really begins.
The Dragun will absorb the serpent and become the Advanced Dragun, with his attacks getting turned up to eleven, and becoming incredibly difficult versions of the normal attacks.
For being the final block between Gungeoneers and the end of the game, this boss holds its own for being the end of many players.
6. Door Lord
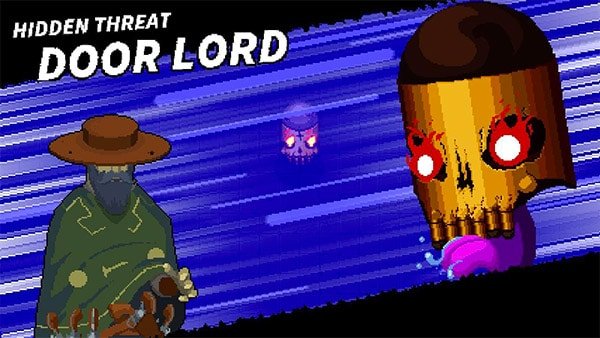
A different Mimic in the Gungeon, this boss takes the form of the boss door, and will teleport into the room once the player enters.
This boss can teleport around the room, fire streams of bullets in all directions, can fire flurries of homing bullets, and shoots lasers around it in a circle to harm the player.
This boss counts as a Mimic even for the bounty challenges in the game, which is a neat connection in the game. Although this boss doesn’t offer too much content, its 1.333% chance to appear on one of three floors, something unique to this boss.
5. Kill Pillars
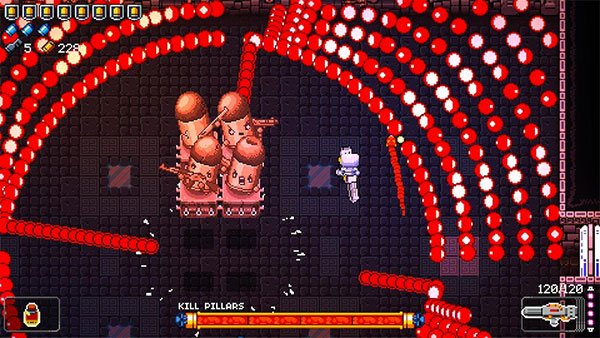
One of the final threats before the final floor, this boss is labeled to be one of the most predictable of the Hollow’s bosses. One special aspect to this fight is that it contains 4 separate bosses, being labeled as ancient heroes.
The difference between this fight and the only other like it, the Trigger Twins of the first floor, is that the Pillars perform synchronized attacks, such as the one most dreaded by those first encountering it.
The Pillars will fill the whole room with bullets except a circle and begin circling double damage bullets (picture above). As it spins, the Pillars will occasionally jump and fire a ring of double damage bullets outwards, requiring a dodge roll.
As the Pillars fall, the remaining gain new attack patterns and become harder to dodge. When only one Pillar remains, they attempt to directly stomp the player and release bullet swarms on landing.
This boss is a large challenge to those who find it in the game for the first time, but after learning its challenges, becomes a relief in the later floors to fight.
4. HS Absolution
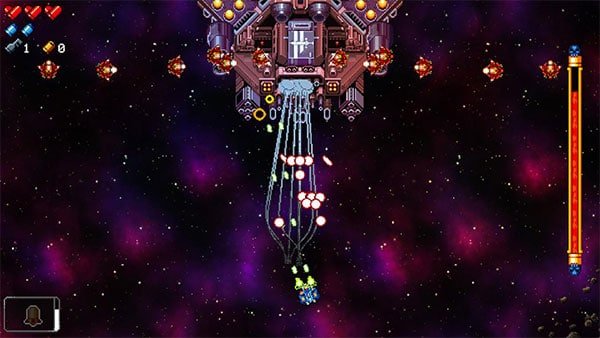
The most unique of the pasts, this is the Pilot’s past where you play in his spaceship and you still have the power of the dodge roll (which is a neat Star Fox reference because it is turned into a barrel roll) which allows you to have a chance against the HS Absolution.
The ship is massive and has many attacks such as the ability to summon many small ships and charge two lasers to restrict movement to the middle of the screen. After firing these lasers, the ship will fire patterns of smaller bullets that are difficult to dodge through.
Along with many rockets, and just an overall barrage of fighting patterns to attack the Pilot. This is one of the most satisfying bosses to beat, and afterwards, the Pilot looks slick in his new outfit.
3. Wallmonger

The Wallmonger appears on the Hollow, the floor right before the Forge, causing many to be frustrated in complex patterns, fire, irregular moving bullets, and one aspect that is unique to this boss; a timer to defeat it.
This boss gets a unique room to fight it which is very long, and the width being the entirety of the boss.
At the beginning of the fight, the wall will awaken at the top wall and begin approaching very slowly towards the player, and bottom wall.
If the player doesn’t kill the Wallmonger fast enough, they get the unfortunate fate of being instantly killed when crushed by the bottom wall. This is the only boss capable of instantly killing you.
This boss is truly a power to behold and it’s hard to think that the game can have gimmicks better than a literal moving wall, but it leads to two of the hardest bosses to find, let alone fight.
2. The Lich

The final boss of the game, the Lich is labelled to be the creator of the Gungeon, and of course is the last boss to fight in the entire game. This boss can only be accessed in Bullet Hell, which requires all four Gungeoneer’s Pasts to be killed for the path to open to Bullet Hell.
Once the room is entered, the Lich laughs at you and fires a warning shot before beginning the fight. In this phase, Lich fires many bullets from his revolver and summons tombstone grunts. This part of the fight is relatively easy and doesn’t bother many people who fight it.
After this the boss dies, the ground begins to shake, and a boney hand breaks the ground under you and drags you down into the abyss. In this second phase, the Lich becomes giant and stays above you on the stage sending bullets out of his ribcage and slamming the ground firing bullets from the side.
After the Lich’s defeat, the Gungeoneer is teleported to a third area where scattered bullet casings fall to the ground, joining together to create the true form of the Lich with arms and legs made of bullets.
This phase has many attacks that absolutely swarm the screen with bullets, covering all but a small sliver of the screen. After many attempts, failures, and a final lucky run, the true creator of the Gungeon can be defeated.
After finishing him off, he loses his bullet limbs and is immobile while panting from exhaustion.
The crosshair for the Gun that Can Kill the Past appears and the last thing needed to finish the run is firing the Gun at the Lich, banishing the evil from the Gungeon for once and for all, or at least until the Gungeon is reentered and time starts all over again.
1. Resourceful Rat
Finally, there is the Resourceful Rat. This boss deserves a category by itself for how much is needed to get to this fight with 100% accuracy. First, over multiple runs the Gnawed Key must be bought, costing a total of 1000 casings.
After this, the key must be brought to the Black Powder Mines where you can find a room with a trapdoor in it. Opening the trap with a key leads you to a long rail with nothing at the end.
If a blank is used, a secret passage opens that can be entered to a small room with no exit. Using another blank opens a second secret entrance with the sewer grate leading to the Rat, which you use the Gnawed Key to open.
After you reach this floor, you must go through the Resourceful Rat’s Maze which requires you to enter 6 different rooms in specific directions or you end up back at an elevator to the next floor.
These directions are given by the item Infuriating Note which can be found 6 times, where each introduces a different direction. These notes can only be found during runs and will replace any chest item (excluding number 6 which is from a Mimic).
For these six notes to unlock you need to: beat the second floor, have something get stolen by the Rat, enter the first secret floor, obtain a Master Round from beating a boss with no hits, kill a specific miniboss Fuselier, and defeat the Dragun.
This is all simply to make it to the fight, and then the fight starts.
The Resourceful Rat starts the fight by summoning cheese towards the center and once it gathers, he causes it to explode in all directions. This phase of the Rat has many attacks that can deal damage very fast and are threatening to the fight.
Some of these include spinning a bullet whip multiple times around the room, making two spirals of cheese bullets, and placing mouse traps that deal damage when stepped on.
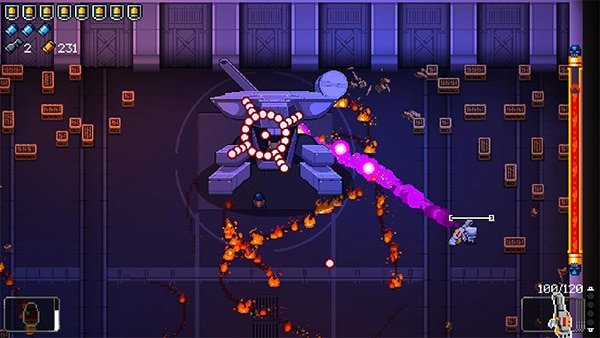
After this first phase is defeated, the Resourceful Rat will retreat down the center of the arena, but unlike the Lich fight, the Gungeoneer jumps down willingly to fight him. In this second phase, the Resourceful Rat has retreated into a giant mech that he has created with weapons he has stolen in the Gungeon.
This mech has a whole new variety of attacks, some rated to be the hardest in the entire game to avoid.
Some include summoning around 30 small units to chase the player, sweeping a laser across the arena, creating an endless amount of bullet rings that if stood in for too long, collapse on the player, and a homing rocket that is marked by a crosshair (the crosshair also being made of bullets with the capability to hurt you).
After many tries and too many resources expended to get to the rat, this phase can be defeated, causing the mech to start exploding. This begins the most creative phase of a fight in this game.

The third phase of the Resourceful Rat fight is a Punch-Out style fight that requires an entire tutorial to teach the player how to box and dodge the Rat’s attacks.
This brawl is an incredibly difficult fight that requires the player to learn which attacks to dodge, which to block, and which to counter. This fight is unique because for once, you don’t need to win to continue the run.
When the Rat gets hit by your punches with any of his 3 health bars (yes, this Rat will never give up) he will drop various items that can be picked up after the third phase, whether you win or not.
Once the final fight is finished, you can reap the rewards, including special Rat Keys that can be used to open equally special Rat Chests that contain four Rat themed items: Resourceful Sack, Partially Eaten Cheese, Rat Boots, and Elimentaler.
The amount of keys you receive depends on how you do during the third phase, you get one key for starting the fight, one for finishing each round with a super punch (gained by using a star gained from countering moves), one for winning the fight, and one bonus key for finishing every round with a 3 star punch.
All the keys can only be used for Rat Chests or 2 other special locations. One or two keys can be used to unlock the serpent, which can be fed items to get the Advanced Dragun fight, and one key can be used to skip the fourth floor entirely.
The sheer number of special mechanics and items that can be received from this boss make it the most unique, and the number one Enter the Gungeon boss.